Why Your Newborn Photos Don’t Look Professional Yet (and How to Fix Them)

You’ve got the camera. You’ve got the baby. You’ve watched the tutorials. And somehow… your photos still don’t look like the ones you see from experienced photographers. This is one of the most frustrating stages of learning newborn photography. Because you’re not bad… but you’re also not getting those polished, professional results yet. The good news? There are very specific reasons this happens and even better, they’re fixable.
1. Your Aperture Isn’t Doing You Any Favors
This is something that’s not talked about enough, but you’re really going to need to invest in a good lens if you want that dreamy, soft blur in your images. If everything is tack sharp from front to back, it flattens the photo. It starts to look more like a phone snapshot than a professional portrait. Most kit lenses simply don’t open wide enough to create that soft, creamy background.
Fix it:
Upgrade to a lens that can shoot at f/2.8 or lower
My personal sweet spot is f/2.0
Get comfortable shooting wide open while still nailing focus
That shallow depth of field is what makes your subject stand out and gives your images that dreamy, high-end feel.
2. You’re Not Following (or Understanding) the Basics Yet
Before you can break the rules, you have to actually know them. A lot of beginner images feel “off” and it usually comes down to composition mistakes.
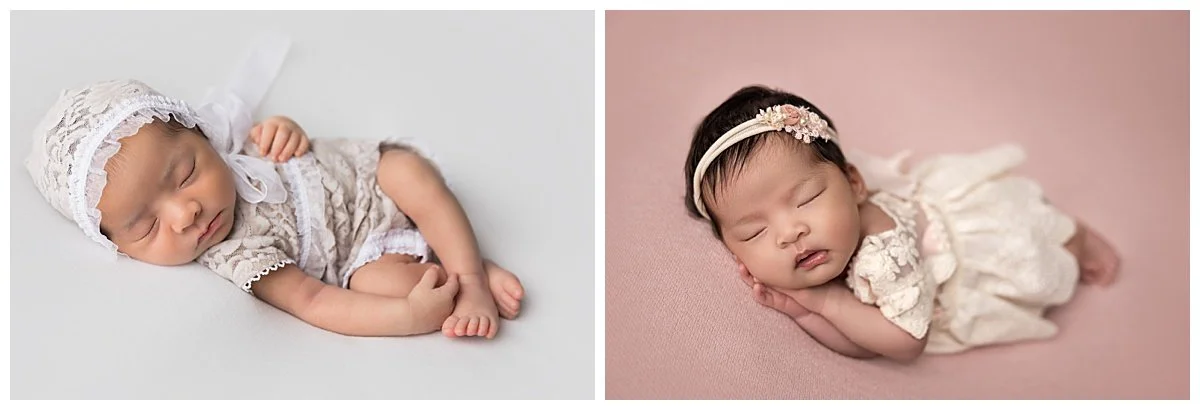
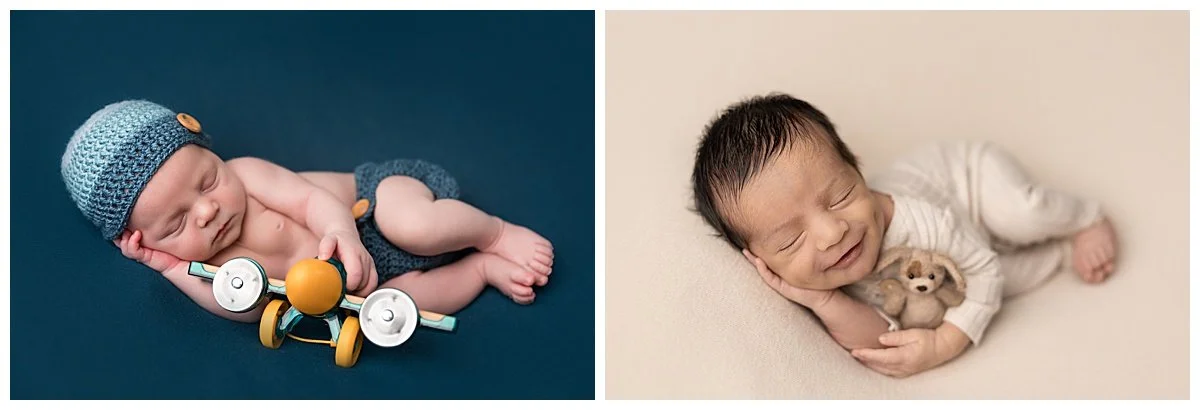
The first baby’s feet are stealing attention away from her face. Second, we still know she has feet but her face is the focus.
Composition Rules You Should Learn:
Rule of thirds
Framing
Leading lines
Balance and intentional negative space
The face should naturally draw your eye first
Once you fix these, your images will immediately start to feel more professional.
Common issues I see all the time:
Shooting slightly from below the baby… if you can see up their nose it’s not good.
Something is closer to the camera than the baby’s face. Make sure the angles of the baby’s position and your shooting position are done so the baby’s face is the main focus, not his hands or his butt!
Baby’s face not being the brightest part of the image. If you have hot spots in other areas of the image, they will draw attention away from the baby’s face.
3. Your Lighting Needs Work
This is one of the biggest differences between beginner and professional images. And no, you don’t need high-end lighting equipment…you can definitely use natural light BUT….. for the most part, once you set up your lighting equipment you can ‘set it & forget it’. Using natural light you will constantly be making adjustments to get the right camera settings and angles. For professional looking images, a close second to a good lens is good lighting, imho.
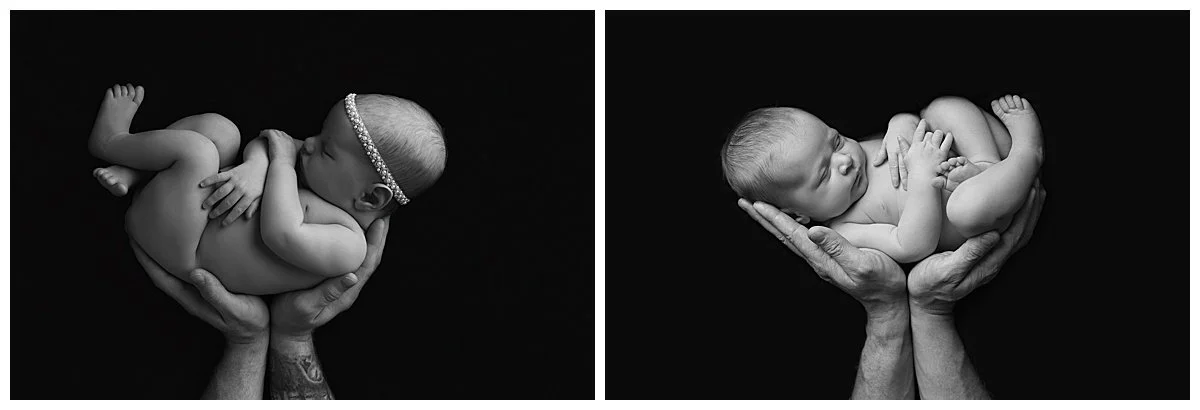
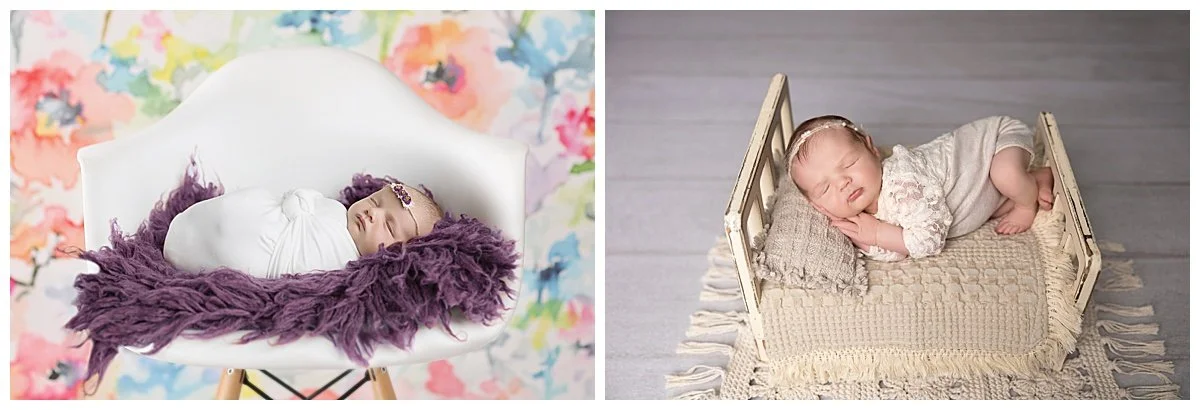
The light is on the back of the baby’s head and shoulder in the first image. The face and front of the baby in the second.
Common problems:
Uplighting that creates shadows in all the wrong places
Harsh shadows across the face
Flat lighting with no dimension
Overexposed highlights or muddy shadows
Fix it:
Use soft, directional light from the side
Keep light consistent across your session
Watch how shadows fall across the baby’s face
Adjust your exposure in camera, not just in editing
Good lighting alone can take your images from “okay” to “wow.”
4. Your Focus Isn’t Where It Should Be
This one is simple but critical. If the eyes are not in focus, the image doesn’t work. Newborns don’t always cooperate, so this takes practice. But it’s non-negotiable.
Fix it:
Use single-point autofocus
Always focus on the eye closest to the camera
Zoom in and double check before moving on
You can have perfect lighting and styling, but if the focus is off, it will always look amateur.
5. Your Swaddling Needs Refining
This is a big one. A poorly wrapped baby can completely ruin an otherwise good image.
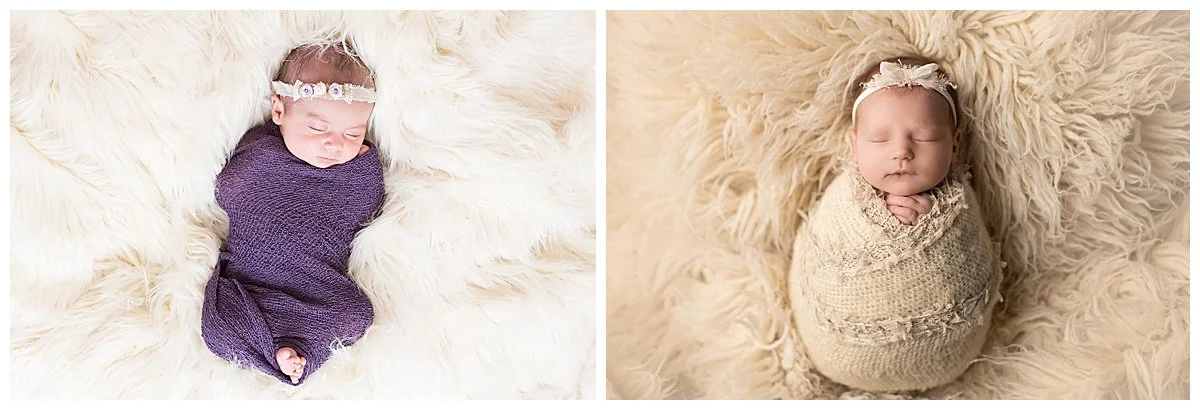
There’s a lot more wrong than just the wrap here, but try to ignore all the other bad stuff and just look at the wrap. 🤦♀️
What’s going wrong:
Baby gets lost in bulky fabric
Awkward shapes that don’t flatter the baby
Wraps that look loose or messy
Baby doesn’t look comfortable or supported
Fix it:
Keep wraps snug but comfortable
Pay attention to clean lines and shape
Practice, a LOT
Study how experienced photographers wrap and pose
Clean, intentional wrapping instantly elevates your work. If you’re still working on getting consistent results, this is something I help photographers refine all the time through my newborn photography mentoring sessions.
6. Your Props Are Working Against You
Not all props are created equal. Cheap, shiny, or poorly fitting items can make your images look dated or distracting.
These big, crocheted outfits do not do the babies justice. Choose something form-fitting and classic.
Common mistakes:
Shiny polyester fabrics
Ill-fitting outfits
Props that overwhelm the baby
Fix it:
Stick with neutral tones
Use soft, matte fabrics like stretchy jersey
Keep setups simple and intentional
Invest slowly in quality pieces over time
When in doubt, simpler is better.
7. You’re Using Too Many Colors
This is one of the fastest ways to make an image feel chaotic. If your eye doesn’t know where to look, it’s not going to land on the baby.
I mean, the flowers are pretty…but where’s the baby?
Fix it:
Use a more monochromatic color palette
Limit the number of colors in each setup
Let the baby be the focal point, not the props
The goal is calm, cohesive, and focused.
To see more examples check out Monochromatic Newborn & Baby Photography: Why It Makes Your Baby Stand Out More.
8. You’re Either Over Editing… or Not Editing the Right Things
Editing should enhance your image, not distract from it.
Common issues:
Overly smoothed skin
Strange skin tones
Ignoring distractions like wrinkled blankets
Inconsistent edits across a gallery
Fix it:
Keep skin texture natural
Focus on clean, true-to-life tones
Remove distractions that pull attention away from the baby
Develop a consistent editing style
Subtle, intentional editing will always look more professional than heavy-handed edits.
What Happens Next
Once you feel confident in all of the above, that’s when things really start to click. That’s also when you can start refining your workflow, posing transitions, and developing your own style. This is where 1-on-1 guidance can make a huge difference. Because instead of guessing what’s off, you have someone walking you through it in real time.
Want Help Getting There Faster?
If you’re tired of second-guessing your work and want clear, direct feedback on what to fix and how to improve, I offer Newborn Photography Mentoring for photographers at every stage.
You don’t need another YouTube video. You need feedback.